Quickstart: from nothing to an embedded configurator
Eight steps — sign in, upload a model, make swatches, map zones, build a menu tree, publish, embed.
The shortest complete route from an empty workspace to a configurator running on your own website. One example runs through all of it: a barstool, exported as a single mesh with four separately coloured parts, three in ash and one in plastic.
Everything below assumes the model was exported correctly. If you are the person making the model, read What a Vysora model has to contain first.
1. Sign in and pick your workspace
Sign in with Email and Password, or Continue with Google. If you have not used Vysora before, Register signs you straight in.
You land on Choose a workspace. Vysora sells three product lines, and each one is a separate workspace with its own plan: the Studio line for furniture and interiors, Showroom for cars, bikes and large goods, Atelier for jewellery, watches and toys. A line you own shows a plan pill and an Enter → button. A line you do not own is dimmed and shows Unlock Studio → instead.
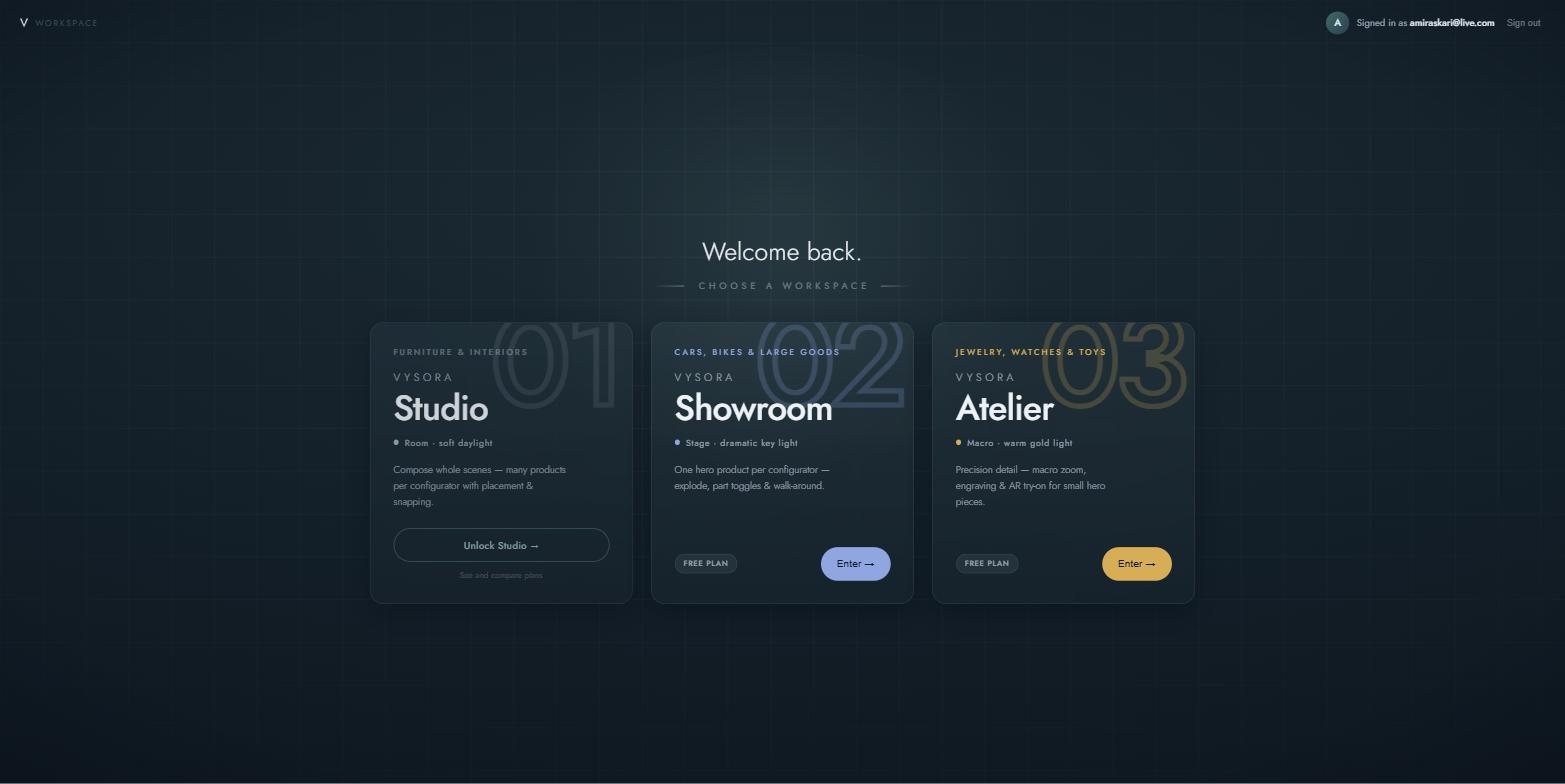
Click the workspace you own. Everything below happens inside it.
2. Upload a model and wait for READY
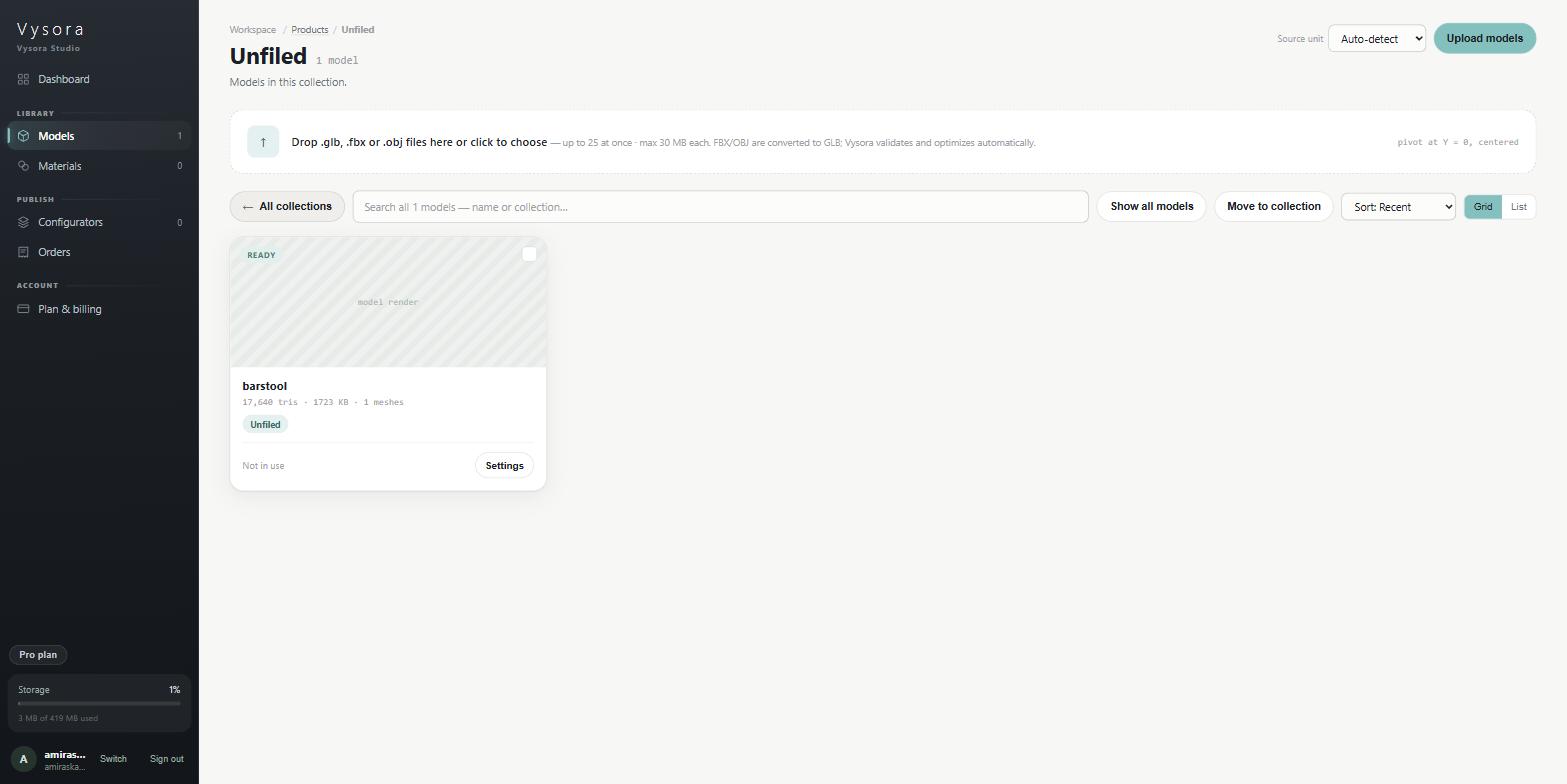
Open Models in the sidebar. The page it opens is titled Products. Same thing.
Before you upload, set the Source unit dropdown in the top bar to the unit your model was authored in: Meters, Centimeters, Millimeters or Inches. The setting applies to the next upload.
Then press Upload models and choose your file, or drop it on the dropzone. .glb, .fbx and .obj are all accepted; FBX and OBJ are converted to GLB automatically. The size cap per model comes from your plan:
| Plan | Max per model upload |
|---|---|
| Free | 5 MB |
| Starter | 15 MB |
| Pro | 30 MB |
The card's status pill moves through UPLOADING, CONVERTING and PROCESSING by itself, with no refresh needed, then settles on READY. A model that finished but raised non-blocking notes shows WARNINGS instead. It still works. Hover the pill to read the notes.
3. Create a material folder and some swatches
Open Materials. A folder is a swatch set: assign a folder to a part of a model and every material inside that folder becomes an option the customer can pick.
Press New material. In the editor, open the Folder dropdown and choose + New folder…, type Oak veneers into the field that appears, name the material Oak Natural, set its Base color, and press Create material. Make the folder from inside the material editor like this. It is the route that carries the folder name through reliably.
Repeat for Oak Smoked in the same folder, then make a second folder, Plastic, holding Plastic Black and Plastic Light Grey.
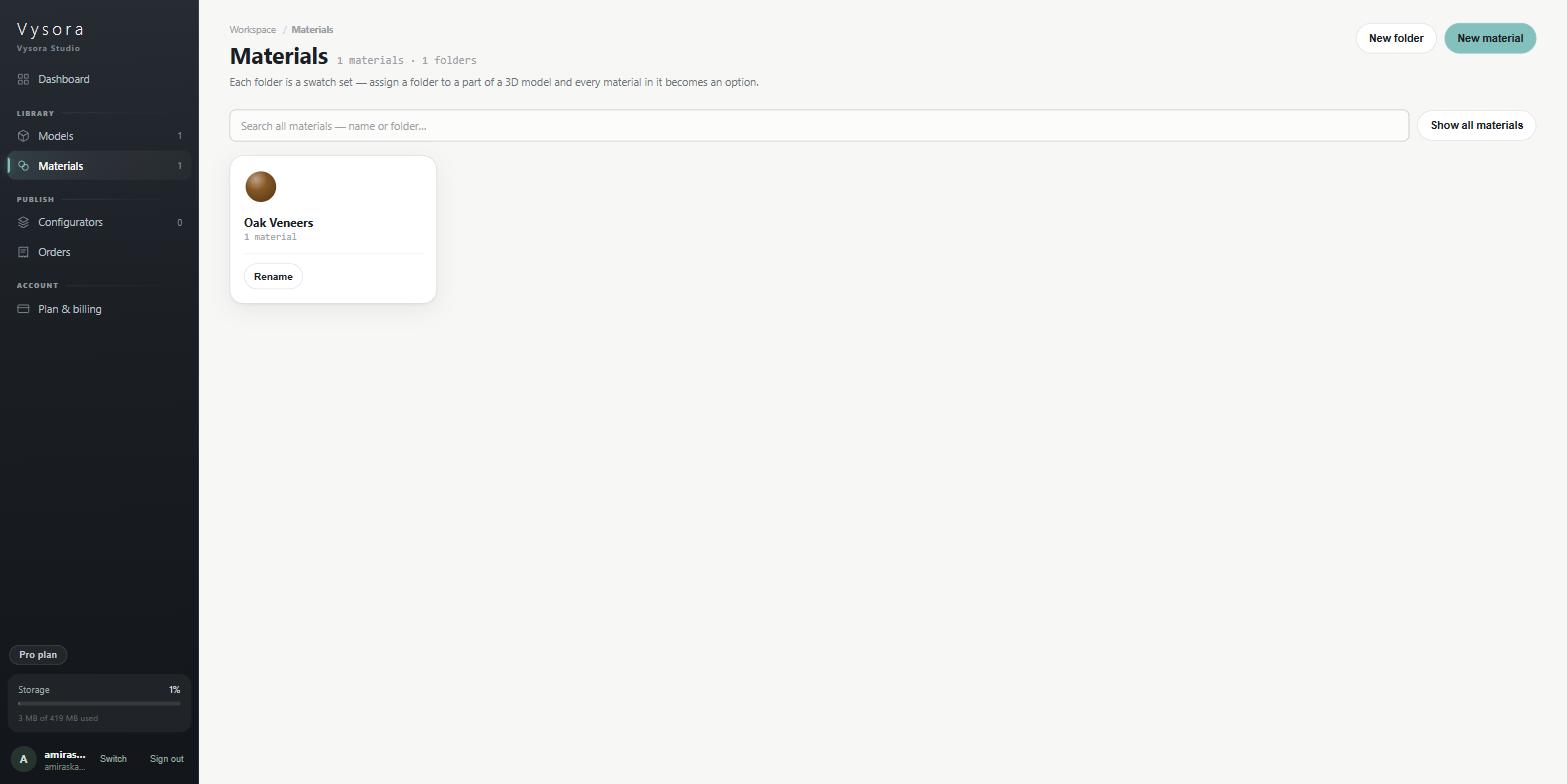
A folder only exists while it has materials in it. There is no empty folder and no folder delete. A material belongs to exactly one folder.
4. Map the model's zones to folders
This is the step people skip, and the one that decides whether anything on the model can be recoloured.
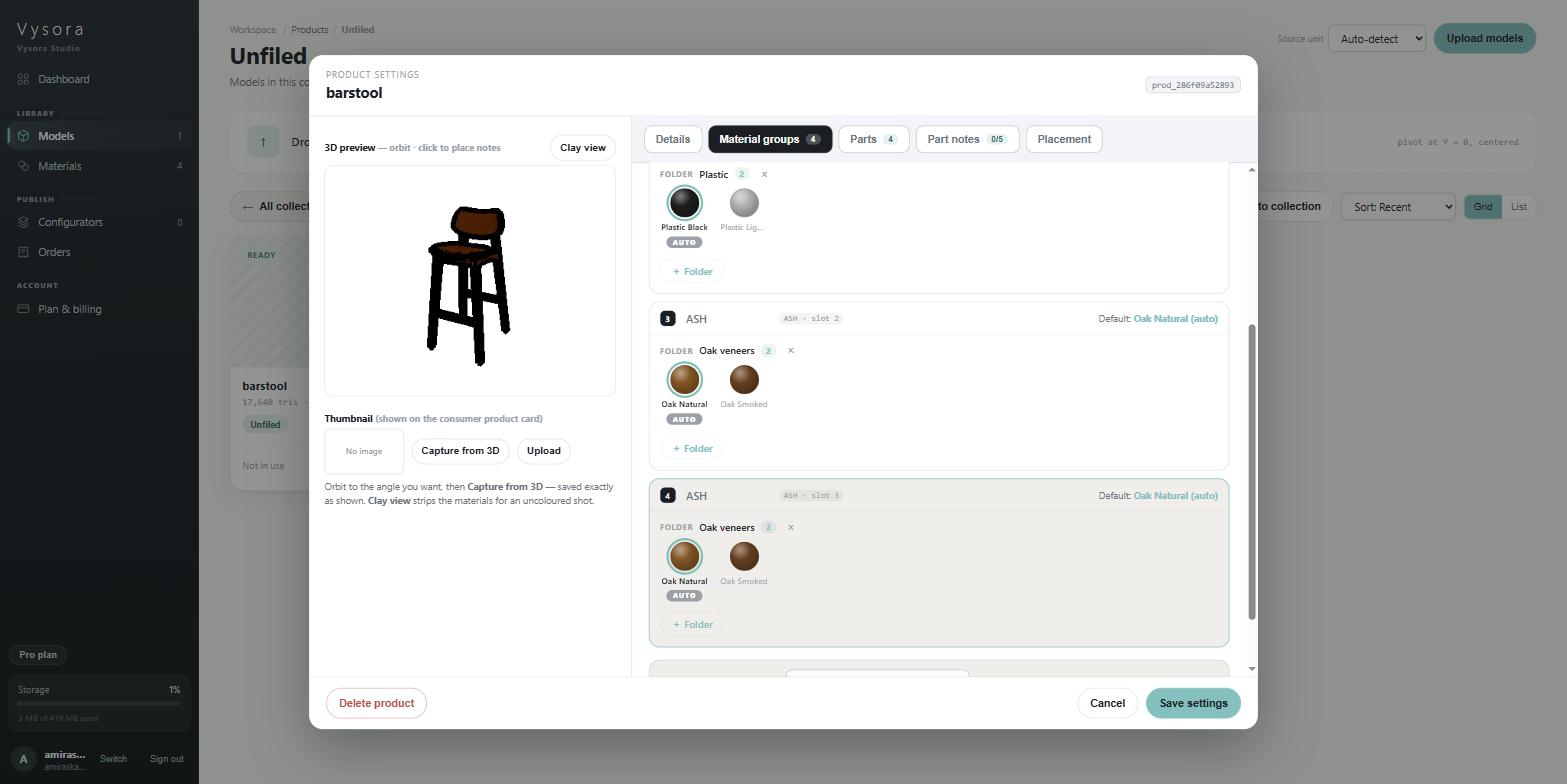
Go back to Models, and press Settings on the barstool card. The modal opens on the Material groups tab. Every row in it is a zone: one independently recolourable part, as the export defined it. The barstool has four — ASH · slot 0, PLASTIC · slot 1, ASH · slot 2 and ASH · slot 3. Three of them carry the same material name. That is why Vysora identifies a zone by its slot number rather than its name.
On each zone, press + Folder and pick a folder from the popover: Oak veneers on the three ash zones, Plastic on the plastic one. The swatches appear underneath. The one with the green ring is the default the configurator opens with; click any other swatch to move the ring, and click it again to return to Auto.
Press Save settings.
5. Build the configurator
Open Configurators, press New configurator, type a Name of at least two characters (Barstool Configurator), and press Create. The builder opens straight away.
Press + Add menu node (top level) and choose Product from the picker. In the node properties pane on the right, click the Product field and pick the barstool. The node renames itself to the product's name.
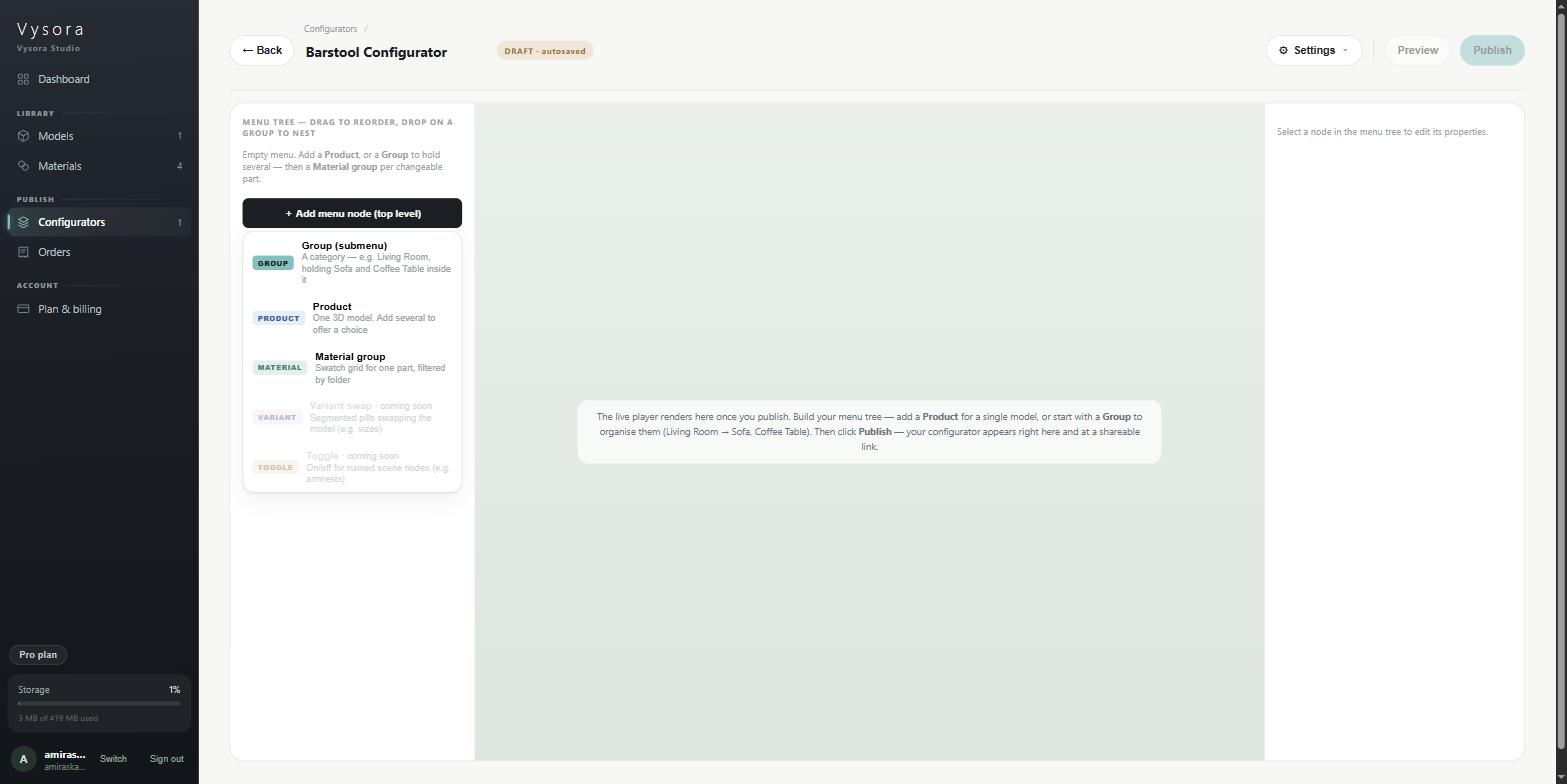
Add a second node, this time Material group. Its Material folders offered row shows a chip per folder in the workspace. Select Oak veneers and Plastic. Leave nothing selected and every folder is offered. A material step only reaches the customer when a placed model actually has a part assigned to one of those folders.
There is no save button. The chip beside the configurator name reads DRAFT · autosaved and writes about a second after you stop typing.
Variant swap and Toggle appear in the picker but are not available yet.
6. Publish
Press Publish. The review dialog opens on Publish "Barstool Configurator" with the subhead Creates v1 and points the live link at it.
Ready to publish lists what the configurator contains and any warnings: bare zones, empty material steps, no product chosen. Warnings never block publishing. They tell you what the customer will find missing.
Check before it goes live holds three rows you can expand with Change: Languages, Theme and Prices. Two settings live only here — the accent colour, and Show a running total to customers.
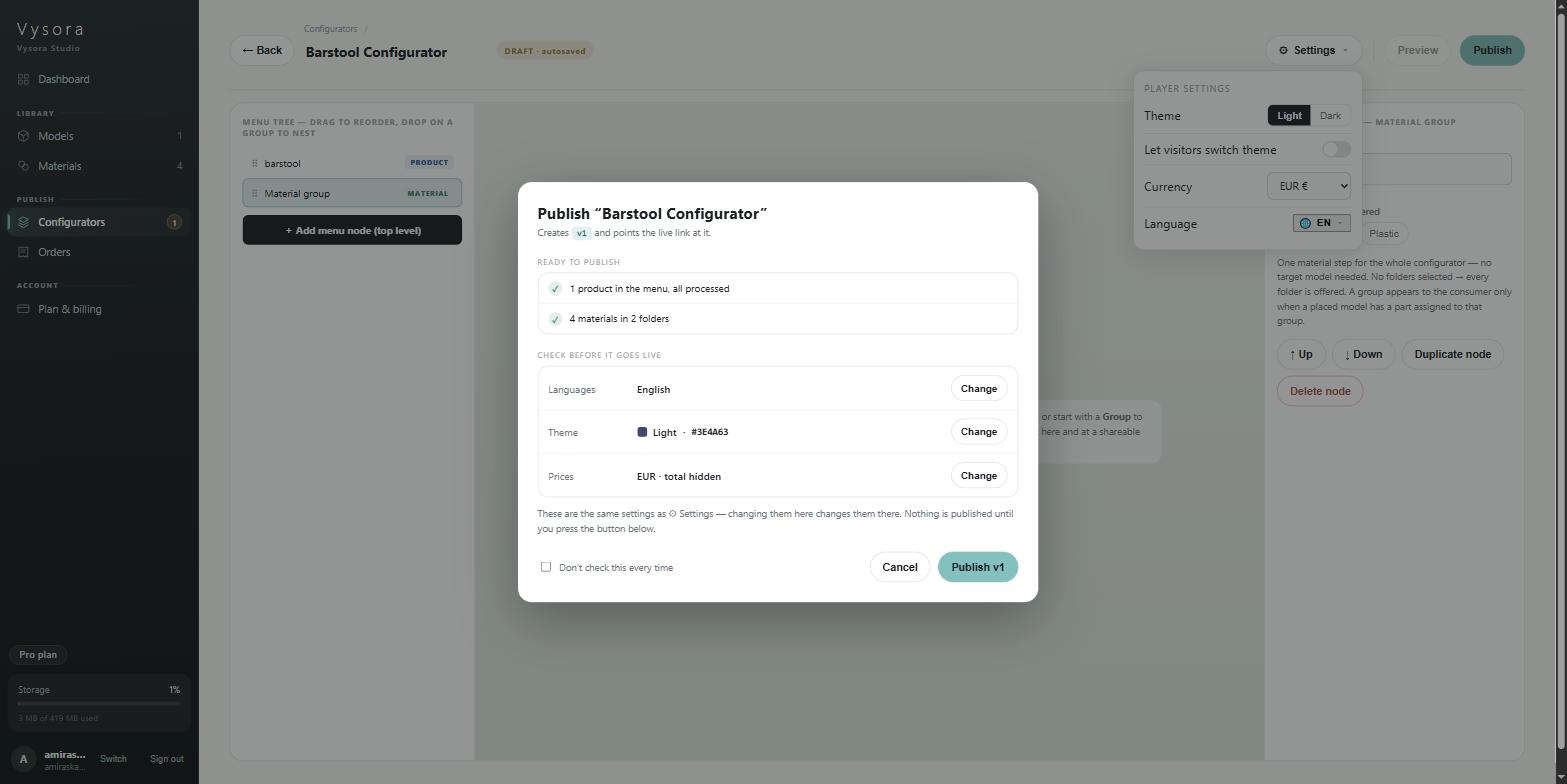
Press Publish v1.
7. Copy the embed code onto your site
The result dialog says Published — v1 is live and hands you two things: an Embed code box and a Direct link. Press Copy embed code. Nothing confirms the copy. Vysora Studio has no toasts, and that silence is normal.
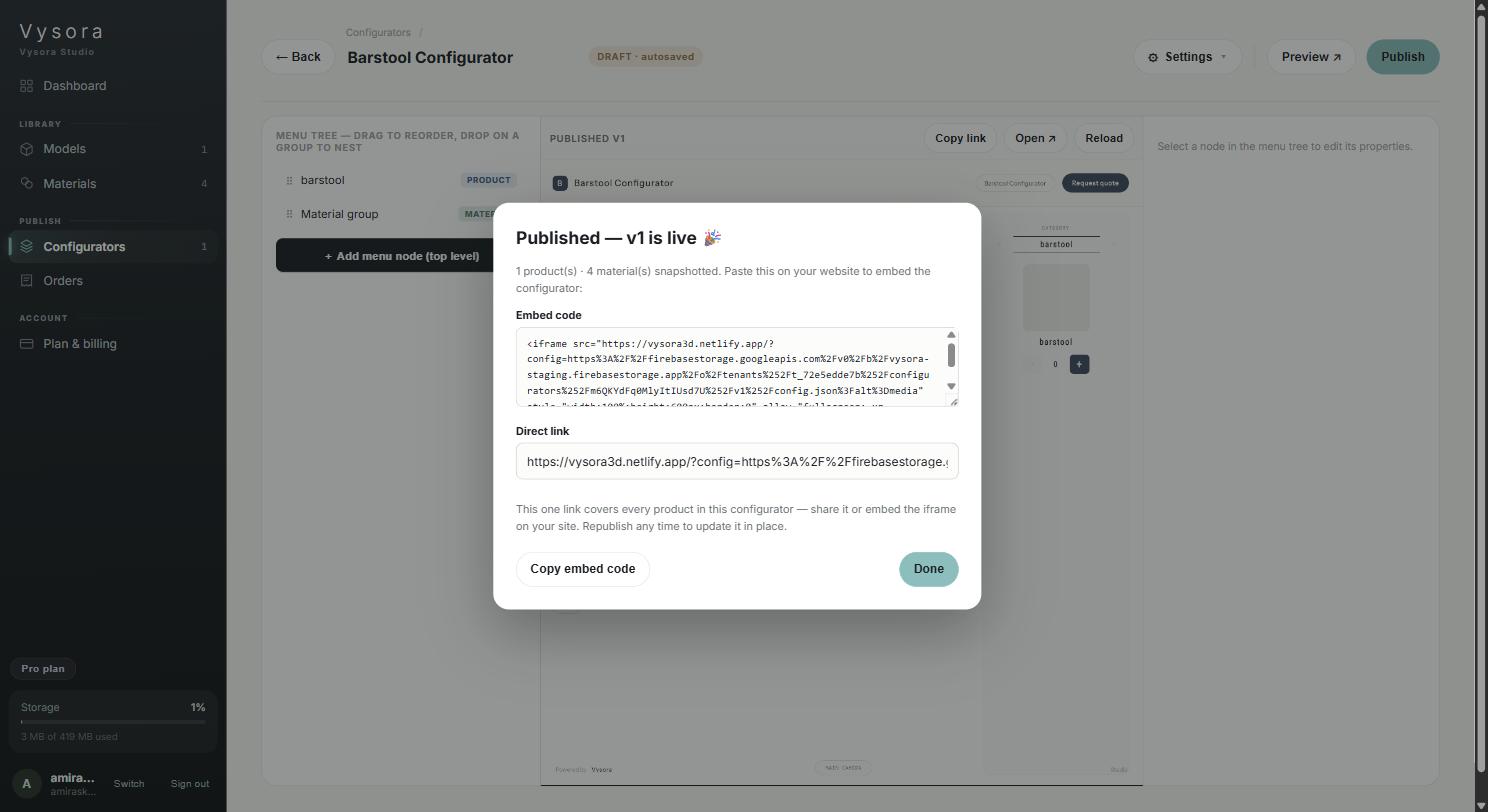
The embed code is a single iframe, in this shape:
<iframe src="{playerUrl}" style="width:100%;height:600px;border:0" allow="fullscreen; xr-spatial-tracking" title="Barstool Configurator"></iframe>
Paste it wherever you want the configurator to appear. Adjust height to suit your page; leave allow as it is, or fullscreen and AR stop working.
The link does not change between versions. When you republish, every page that already carries this iframe updates in place.
What to do next
- Read Core concepts once. It is short, and it explains why the same idea is called a folder in one screen and a
Material groupin another. - Add a thumbnail to the product, from
Settings→Capture from 3D, so the customer's product card is not a placeholder. See Models and the product library. - Group several products under
Group (submenu)nodes before the tree gets long. See Building the menu tree. - Set your logo and business details from the sidebar avatar, then publish again. They are baked in at publish time. See Publishing and versions.