Uploading and organising models
Uploading a 3D model, setting its source unit, reading the processing states, filing it into a collection, and working the product settings modal.
Everything a customer can look at in a published configurator starts as a 3D file you upload here. The nav item is called Models; the page it opens is titled Products. Both mean the same thing: one uploaded 3D file and the settings attached to it.
This page covers getting a file in, what Vysora Studio does to it, and keeping the library tidy. Mapping the recolourable parts comes next and has its own page.
Uploading a model
There are three ways to start, and they all do the same thing:
- Click
Upload modelsin the top bar. - Click anywhere on the dropzone.
- Drag files onto the dropzone.
You can select more than one file at once. Each file uploads on its own and appears in the library as its own card.
Accepted formats
Vysora accepts .glb, .fbx and .obj. FBX and OBJ are converted to GLB on the server before anything else happens, so you do not need to convert them yourself.
If you pick anything else you get this, in red, under the dropzone:
Accepted formats: .glb, .fbx, .obj. FBX/OBJ are converted to GLB automatically.
Prefer GLB where you have the choice. It carries its materials and textures inside the file. A single-file OBJ upload does not carry its .mtl or its textures at all: the geometry arrives, the materials do not, and you re-assign them in Studio afterwards.
Size cap per model
The cap is per file, and it comes from your plan:
| Plan | Maximum per model |
|---|---|
| Free | 5 MB |
| Starter | 15 MB |
| Pro | 30 MB |
| Enterprise | 100 MB |
The dropzone shows your own figure in its helper line (max {N} MB each). If a file is over, the upload is refused before any bytes move, with a message naming your plan, your limit and the next tier up:
“chair.glb” is 41.2 MB — your Starter plan allows 15 MB per model.
Pro allows 30 MB. Otherwise, decimate the mesh or downscale the textures and re-export.
There is also a platform ceiling of 200 MB that sits above every plan, and two hard limits in processing that no plan changes: 500,000 triangles and 4096 × 4096 as the largest texture dimension. A model over either is rejected, not warned about.
Set the source unit before you upload
Next to the Upload models button is a dropdown labelled Source unit, with the options Auto-detect, Meters, Centimeters, Millimeters and Inches. Its tooltip explains the purpose:
Unit the model was authored in — Vysora normalizes it to metres so snapping and dimensions stay correct
The setting applies to the next upload. Set it, then drop your files.
Treat it as a required step. Everything downstream of the model is measured in metres: the snap grid, the dimensions a customer reads off the ruler, where clones can be placed, where part notes anchor. If the unit is wrong, all of it is wrong together, and the model either ships the size of a matchbox or the size of a building.
Auto-detect guesses from the model's raw size, and it guesses badly in three situations you will actually meet:
- Inches are never detected. An inch-authored model will always be read as something else.
- Anything genuinely larger than 8 m is assumed to be a centimetre model and comes out a hundred times too small.
- A millimetre model under 800 mm is assumed to be centimetres. A 400 mm vase ships four metres tall.
Declaring the unit costs one click and removes the whole class of problem. Getting it wrong is fixable afterwards, as Scale and units below describes, but the fix re-processes the model rather than editing a number.
What the status pill means
Each card carries a status pill in the top corner. It updates on its own; you do not need to refresh.
| Pill | What is happening |
|---|---|
UPLOADING |
The product record exists, the bytes are still transferring. |
CONVERTING |
An FBX or OBJ file is being converted to GLB. |
PROCESSING |
Vysora is validating the model, optimising it and generating levels of detail. |
READY |
Finished, with nothing to report. |
WARNINGS |
Finished, and the model produced non-blocking warnings. |
FAILED |
Processing rejected the model. |
The typical warnings are worth acting on even though nothing forces you to. A model with a single material can only ever be recoloured as a whole. A model whose pivot is not at floor level gets auto-grounded rather than placed exactly. A model whose size looks implausible is telling you the source unit was probably wrong.
There is no percentage and no estimate for processing. The only percentage anywhere in the flow is the byte-transfer figure during upload; the bar on a processing card is an indeterminate indicator, not progress. Processing cannot be cancelled. A model that is genuinely stuck can be removed with the outlined Remove button on its card, which frees the product slot it is holding.
A FAILED card replaces its usual meta line with the reason it failed. If no reason was recorded you get Processing failed — check function logs. The common causes are the two hard limits above, an export that is not valid GLB, and a file with no mesh geometry in it at all.
Collections
The library opens on collections rather than on a wall of models.
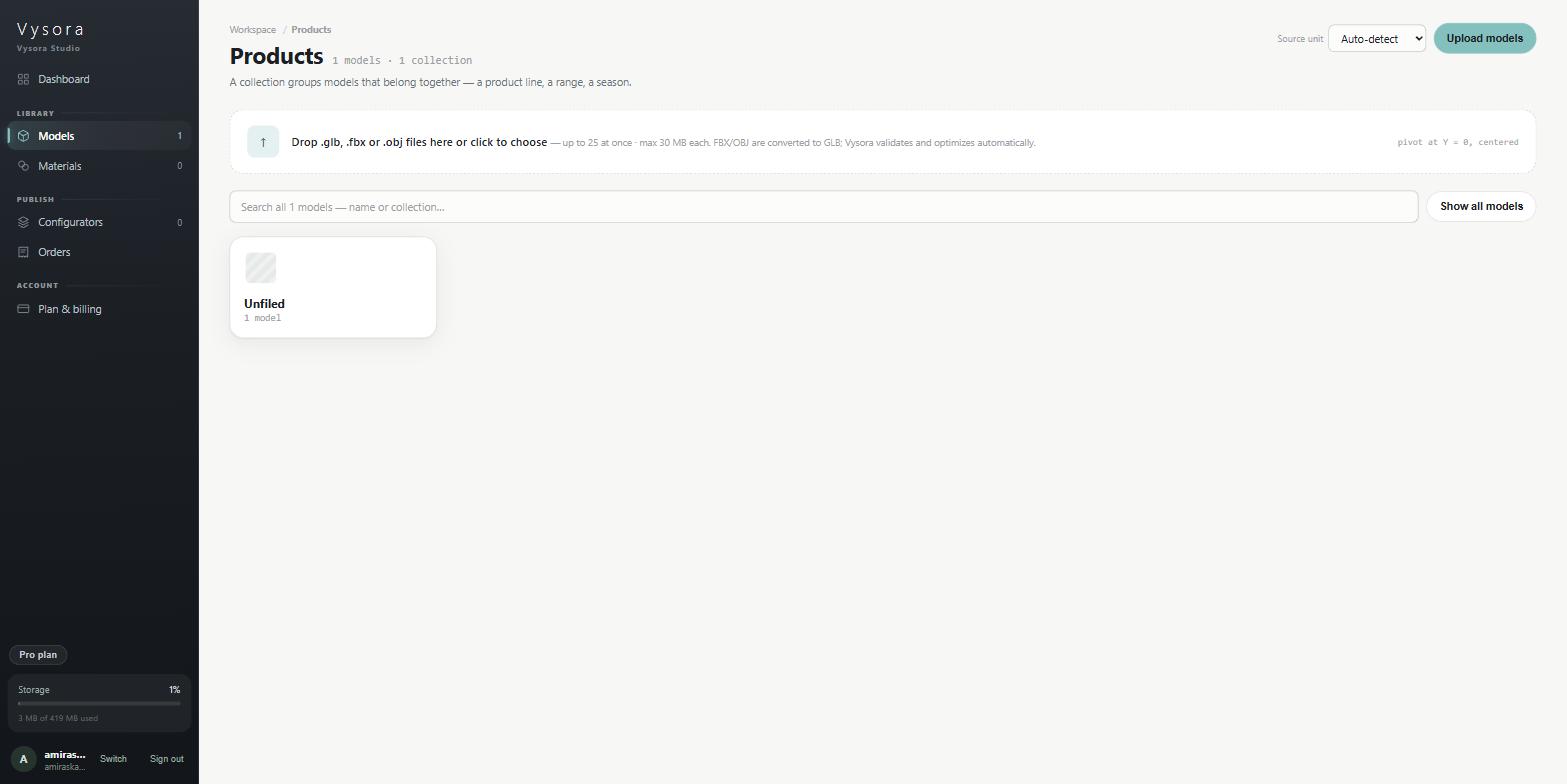
A collection is the model's first tag. That is the whole mechanism. There is no separate folder record anywhere: filing a model into Seating writes Seating as its first tag, and the collection tile is drawn from every model that shares it. Any other tags you add stay as they are and show as plain chips on the card.
Two things follow:
Unfiledis every model with no tags at all. Nobody created it, it always sorts last, and it has noRenamebutton. Treat it as a to-do list.- Moving a model between collections is a one-field change. It cannot break anything.
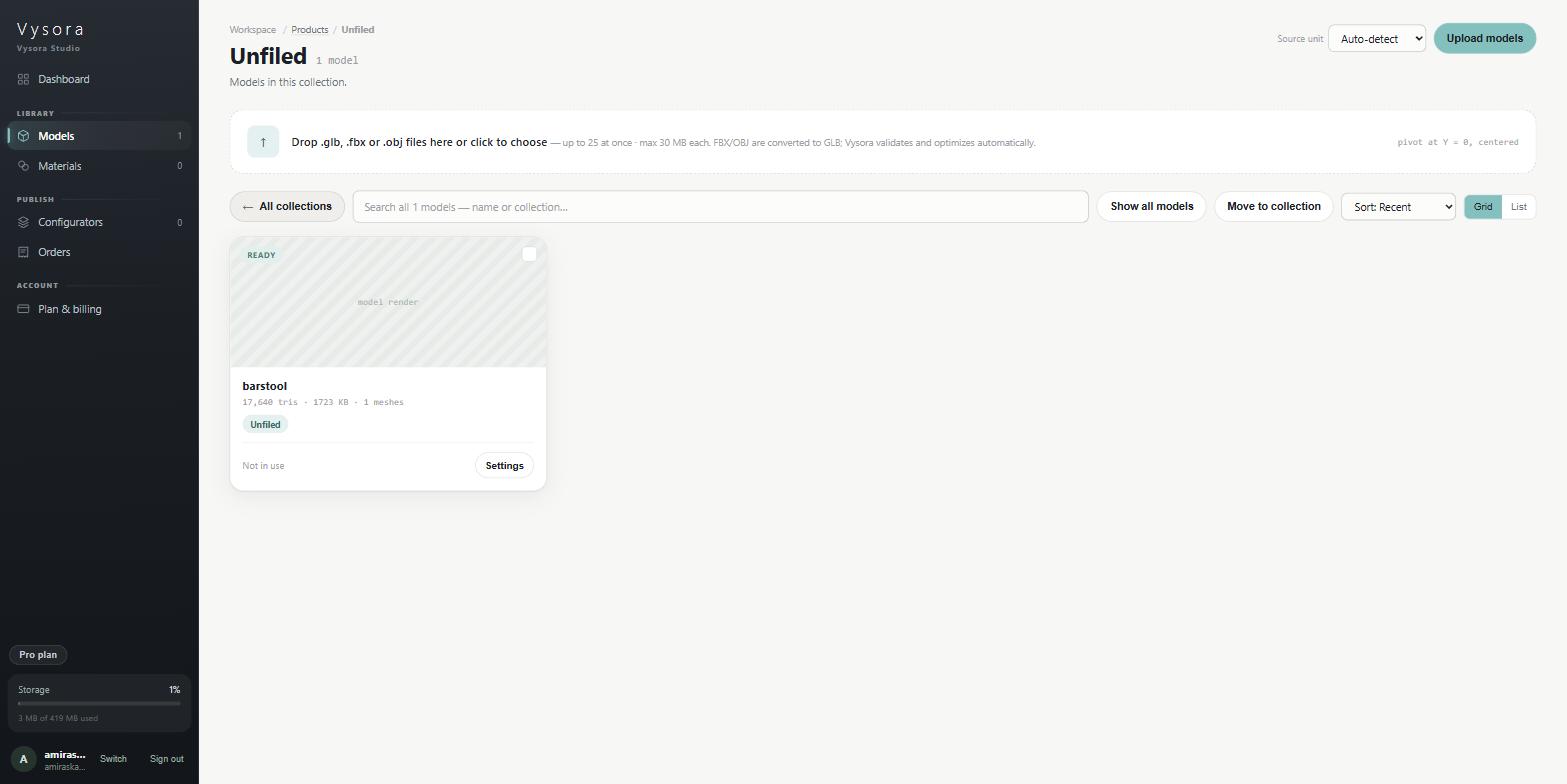
Filing models
Open a collection or turn on Show all models, then click Move to collection. Every card becomes a checkbox. Tick what you want, type a name into the field marked Collection — a new name creates one, and click Move. Typing a name that does not exist yet creates that collection. Click Done to leave selection mode.
The bulk bar states the consequence out loud while you work: organisational only — published configurators are unaffected. That is exactly true. Collections tidy your library and nothing else. A configurator that offers a model keeps offering it wherever you file it, published or not.
Material folders behave the opposite way, where reorganising the library does change what shoppers see. Keep the two apart in your head.
Both bulk operations handle up to 500 models at a time.
Renaming a collection
Rename sits on each collection tile at the root view. The dialog says what it will do:
Renames it on all {n} model(s) in it. Type an existing collection's name to merge the two — which is how you fix a collection that got split by a typo.
Finding a model
The search field searches the whole library, always, whatever collection you are standing in. It matches on name or on any tag, case-insensitively. Collections organise the library; they never hide a model from search.
In grid view, Esc clears an active search, and a second Esc takes you back to the collections root.
The product settings modal
Click Settings on a card to open the product settings modal. Everything about one model lives here, across five tabs, with the 3D preview and the thumbnail controls pinned to the left of all of them.
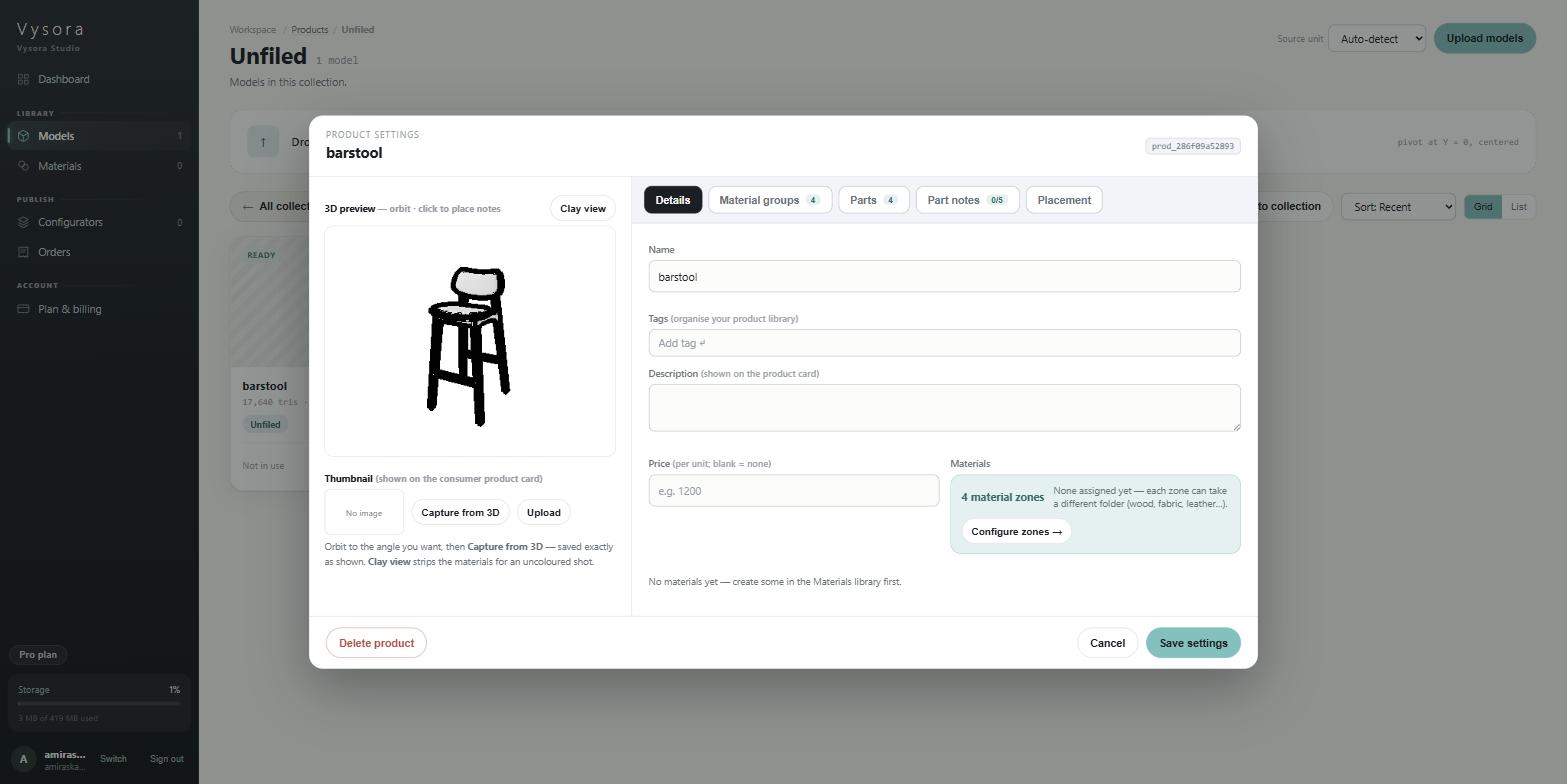
| Tab | What it is for |
|---|---|
Details |
Name, tags, description, price, and a read-only summary of how many zones are mapped. |
Material groups |
Deciding which parts of the model a customer can recolour, and with what. |
Parts |
The display name each part is called in front of the customer. |
Part notes |
Up to five short notes pinned to points on the model. |
Placement / Size & scale |
Snapping, instance limits, and the source unit. |
Material groups matters most and takes the most explaining, so it has a page of its own. The modal opens on that tab by default when a model has zones and none of them have ever been mapped, which is a deliberate nudge rather than an error.
Details holds the commercial information. Price is per unit and blank means none; there is no currency selector here, because currency is a configurator-wide setting. Tags are lower-cased and de-duplicated as you add them, and the first one is the model's collection. The Materials block at the bottom is read-only and tells you, in one line, how many zones the model has and how many are assigned. Configure zones → jumps you to the Material groups tab.
Parts gives each detected part the name the customer reads — Seat rather than ASH. Renaming is label-only; Vysora still matches on the real name from your export underneath. The display name is the same field that appears on the zone card in Material groups, so editing it in either place changes both.
Part notes pins up to five short notes to exact points on the model. Press + Add note, then click the point you want. Note mode disarms after each placement, so press the button again for the next one. Titles are capped at 60 characters and bodies at 200. Customers see notes only when they turn on Notes in the player, so they are off by default for the shopper.
The Placement tab
Studio line only
Showroom and Atelier workspaces see a tab called Size & scale here instead, holding the display-size control rather than the placement controls. The snapping and instance settings below are Studio-only and are hidden entirely on the other two lines.
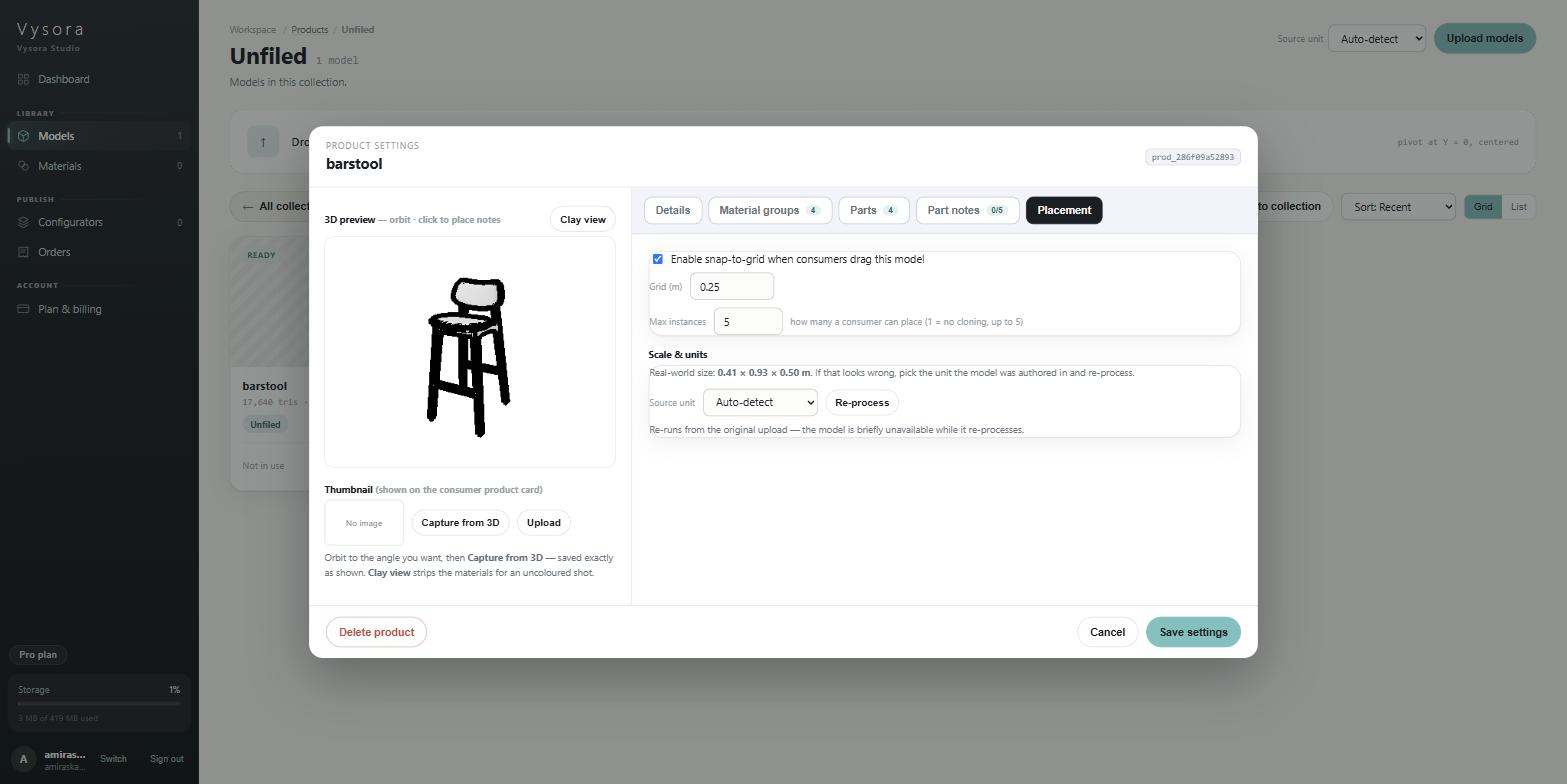
| Control | What it does | Default |
|---|---|---|
Enable snap-to-grid when consumers drag this model |
Makes the model settle onto a regular grid as a customer moves it around the room, instead of landing anywhere. | On |
Grid (m) |
The spacing of that grid, in metres. Only shown when snapping is on. | 0.25 |
Max instances |
How many copies a customer may place — the hint reads how many a consumer can place (1 = no cloning, up to 5). |
5 |
Set Max instances to 1 for anything that would not sensibly repeat in a room. The value is clamped to the range 1 to 5 when you save, whatever you type.
Snapping is a matter of taste and of what the model is. A 0.25 m grid keeps a row of dining chairs looking deliberate. A rug or a floor lamp is usually better off unsnapped.
Scale and units
The Scale & units section sits at the bottom of the same tab and is present on every product line.
If the model processed successfully you will see its measured size, for example Real-world size: 0.41 × 0.93 × 0.50 m, followed by If that looks wrong, pick the unit the model was authored in and re-process. If the size is well outside what is normal for your product line, Vysora says so plainly and tells you a unit mismatch is almost always the cause.
Reading that line is the quickest check you can do on a fresh upload. Furniture is somewhere between 0.2 m and 4 m across. If your barstool says it is 93 metres tall, the unit is wrong.
To fix it, choose the correct unit under Source unit and press Re-process. Vysora re-runs the model from your original upload, so corrections never compound: re-processing a model three times with three different units gives the same result as getting it right the first time. The helper under the button says what to expect: Re-runs from the original upload — the model is briefly unavailable while it re-processes.
One further consequence: zones are derived from the processed model, so re-processing can change the set of zones. If it does, per-zone settings that pointed at a zone that no longer exists are dropped, and the model comes back with those zones unmapped. Check the Material groups tab after any re-process.
Deleting a model
Open the model's settings and use Delete product in the footer. It is a two-click confirm: the button becomes Confirm delete, and the second click does it. The only way back out is to close the modal.
The confirmation you may also meet from the library reads:
Delete “barstool”? This frees a product slot and can't be undone.
What deletion does:
- Removes the product record and, as far as it can, every stored file behind it — the original upload, the optimised versions and the thumbnail.
- Frees a product slot against your plan quota immediately.
- Cannot be undone. There is no trash and no version history.
Next
With the model uploaded, sized correctly and filed, the next step is building the swatch sets it will offer — see Materials and folders — and then making its parts recolourable.