Materials and folders
How folders work, every PBR control and its range, texture limits, and what renaming or moving a folder does to a live configurator.
The materials library is where you build the swatches a customer chooses between. It has two levels: folders at the root, and the materials inside them.
A folder is more than a filing device, and it pays to know why before you create anything.
A folder is a swatch set, and it is also the thing you assign
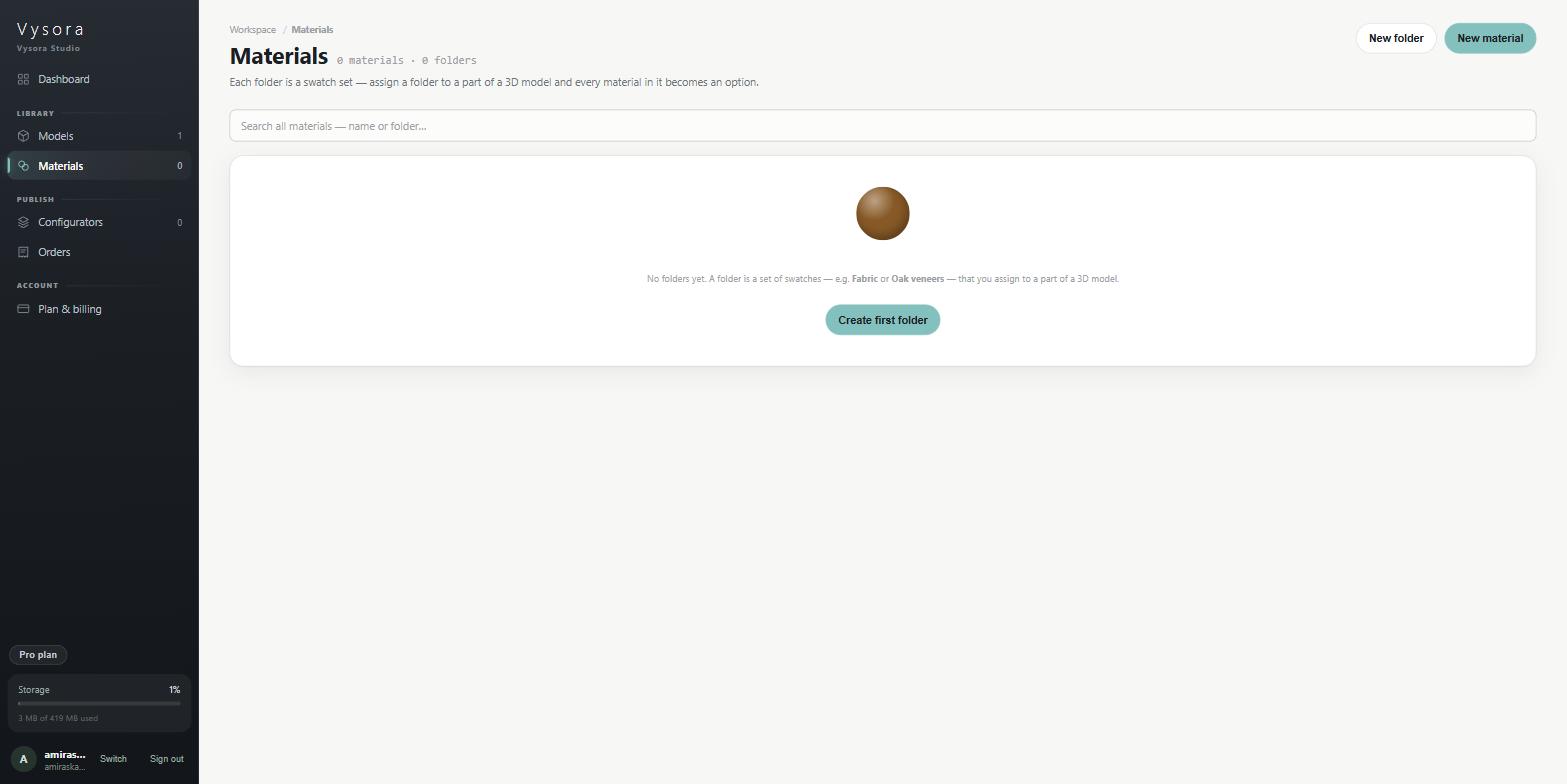
The root screen says it, and the sentence rewards a second read:
Each folder is a swatch set — assign a folder to a part of a 3D model and every material in it becomes an option.
That is the whole model. A folder does two jobs at once:
- It groups materials so you can find them.
- It is the unit you attach to a part of a model on the Material groups tab. Attach the folder Oak veneers to the seat of a barstool and the customer gets every material in Oak veneers as a swatch on that seat. Not a list you curated separately. The folder itself.
The consequence is the single most important thing on this page: reorganising the library changes what shoppers see. Moving a material from Oak veneers into Plastic removes it from every part bound to Oak veneers and adds it to every part bound to Plastic. Filing is a product-configuration change wearing the clothes of a tidying job. Vysora says as much in the bulk bar, where the warning under Move to folder… reads also changes which parts show them.
Three rules follow from the way folders are stored.
A material belongs to exactly one folder. There is no way to put one swatch in two sets. If Oak Natural needs to appear both on a wood-framed chair and on a wood-topped table that offer different ranges, duplicate the material and file each copy in its own folder.
Empty folders cannot exist. A folder is nothing more than a name shared by a set of materials, so it comes into being when its first material is saved and disappears when the last one leaves. The New folder dialog says this outright: Folders are just a shared name — this one appears once you save its first material.
Unfiled is not a real folder. It is where every material with no folder ends up. It always sorts last, and it has no Rename button. If a part is bound to nothing and your swatches are sitting in Unfiled, no customer will ever see them.
Creating a material
New material in the top bar opens the editor. If you have a folder open at the time, that folder is pre-filled for you.
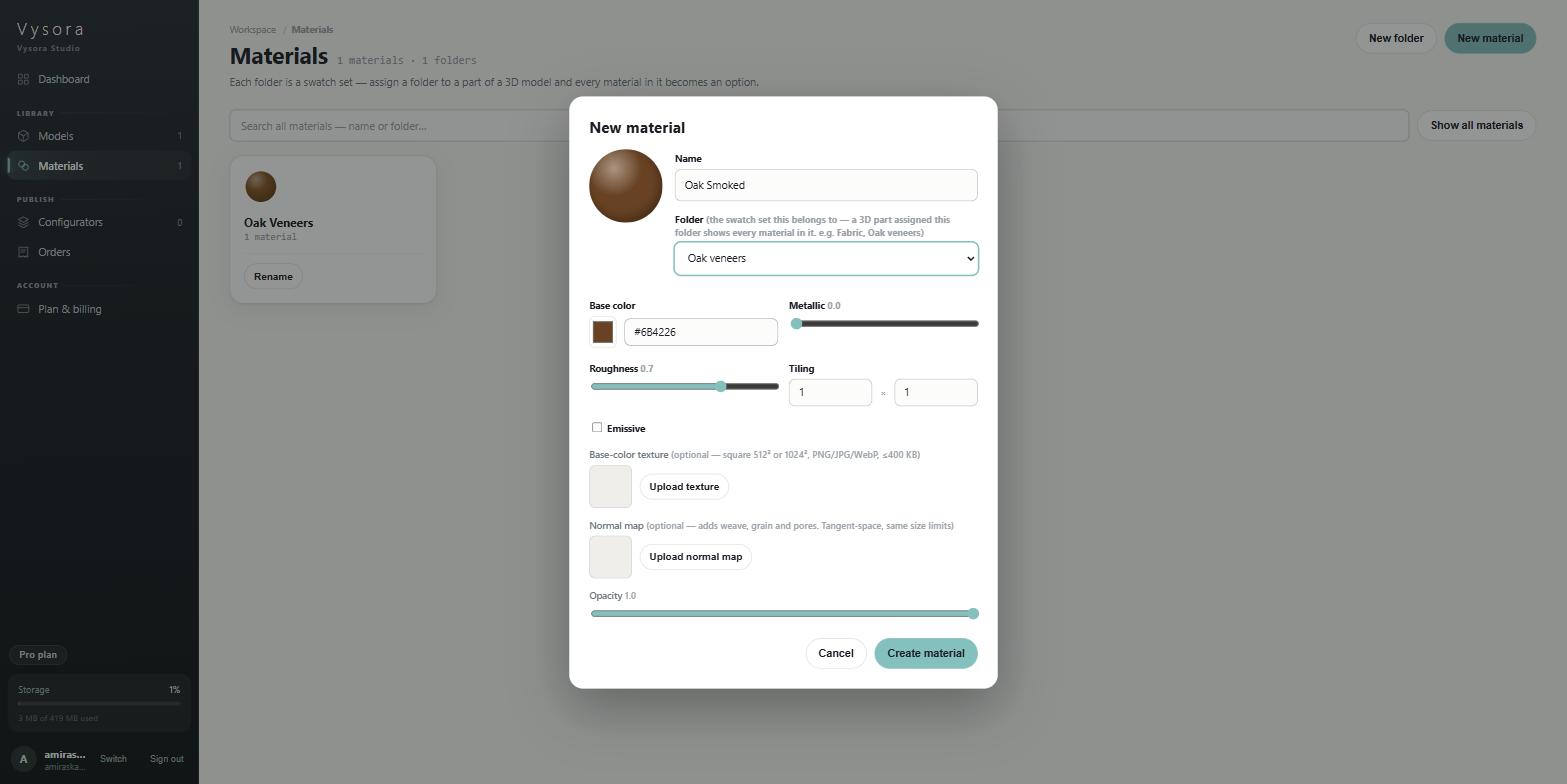
Two fields establish identity:
Name— required.Create materialstays disabled until there is something in it. Name swatches the way a customer would read them:Oak Natural,Plastic Light Grey.Folder— the dropdown offers— none —, then each existing folder, then+ New folder…at the bottom. Its own helper explains the stakes:the swatch set this belongs to — a 3D part assigned this folder shows every material in it. e.g. Fabric, Oak veneers.
The PBR controls
Everything below the identity fields describes how the surface behaves in light. The sphere on the right updates live. It is a fast approximation rather than a full render, and it is drawn as a sphere on purpose, because a sphere shows the roughness falloff and the specular hotspot that a flat chip cannot.
| Control | Range | Default | What it does |
|---|---|---|---|
Base color |
any hex | #8B5A2B |
The surface's own colour, set with a colour picker or by typing a hex value. At high metallic the preview darkens it toward near-black, which is how real metals behave. |
Metallic |
0 – 1, step 0.01 | 0 |
0 is plastic, wood or fabric: a soft, broad highlight, colour as you picked it. 1 is metal: the body darkens and desaturates, the highlight tightens into a bright hotspot, and a chrome-like streak appears. There is little useful ground in between — most materials are 0 or 1. |
Roughness |
0 – 1, step 0.01 | 0.7 |
0 is mirror-sharp with a tight highlight. 1 is matte, with the highlight spread out and softened. This is the dial that separates satin from gloss. |
Tiling |
X and Y, minimum 0.1, step 0.5 | 1 × 1 |
How many times a texture repeats across the part. 1 × 1 stretches one copy over the whole surface; 4 × 4 gives sixteen smaller repeats. It has no effect on a material with no texture. |
Emissive |
checkbox, plus a colour | off, colour #000000 |
Makes the material appear to glow in its own colour — for lit signage, screens and lamp shades. |
Normal strength |
0 – 2, step 0.01 | 1 |
How pronounced the relief from the normal map is. Below 1 flattens it, above 1 exaggerates it. The slider appears only once a normal map is attached. |
Opacity |
0 – 1, step 0.01 | 1 |
Anything below 1 reads as tinted or frosted glass. |
Two of them have a catch.
Emissive needs a colour. Ticking the box leaves the emissive colour at black, and black emits nothing. Pick an actual colour after you tick it, or the material will look exactly as it did before.
Opacity does not bend light. As soon as you drop below full opacity the editor tells you what it will and will not do:
Renders as tinted / frosted glass. Vysora doesn't simulate refraction yet, so this won't bend what's behind it — good for coloured glass, acrylic and sheer fabric, not for gems.
Slider values read as 0.0, 0.7, 1.0 and so on — two decimal places with one trailing zero trimmed. There is no control here for ambient occlusion, clearcoat, sheen, IOR, transmission or double-sidedness. Those are not part of this screen.
Textures
Two texture slots sit below the sliders.
| Slot | What it is for |
|---|---|
Base-color texture |
An image painted across the surface in place of the flat colour — a wood grain, a weave, a printed pattern. |
Normal map |
Fine surface relief without extra geometry — weave, grain, pores. Must be tangent-space. |
A normal map is what separates convincing fabric from vinyl and convincing wood from laminate. Without one, every surface is perfectly smooth no matter what colour it is.
Both slots enforce the same limits, and they are strict:
| Rule | Value |
|---|---|
| Formats | PNG, JPG or WebP |
| Maximum file size | 400 KB |
| Dimensions | square, and exactly 512 × 512 or 1024 × 1024 |
The dimension rule is a hard accept-or-reject, not a resize. 256 × 256 is refused. 2048 × 2048 is refused. 800 × 600 is refused. Prepare textures at 1024² where the detail earns it and 512² where it does not, and compress to fit under 400 KB before you upload. The messages you will meet if you do not:
Texture must be PNG, JPG or WebP.
Texture exceeds the 400 KB limit — compress it and retry.
Texture must be square 512×512 or 1024×1024 (this is 2048×2048).
On a brand-new material you can pick a texture before the material exists. It is checked and previewed straight away, but the file itself is held back until you press the button. The helper under the slot says Uploads when you press Create material. If that upload fails for any reason, the material is still saved; the editor reopens on it with the error and you can retry the upload.
Under the sphere preview, a small flat chip appears once a base-colour texture is attached. That chip shows the texture at your current tiling values without the sphere's distortion, so use it rather than the sphere when you are setting tiling.
The number of texture files you can store is capped by your plan. A texture that cannot be stored surfaces as an upload error.
Duplicating a material
Duplicate is the fastest way to build a range: one Oak Natural, then a duplicate at a darker base colour for Oak Smoked.
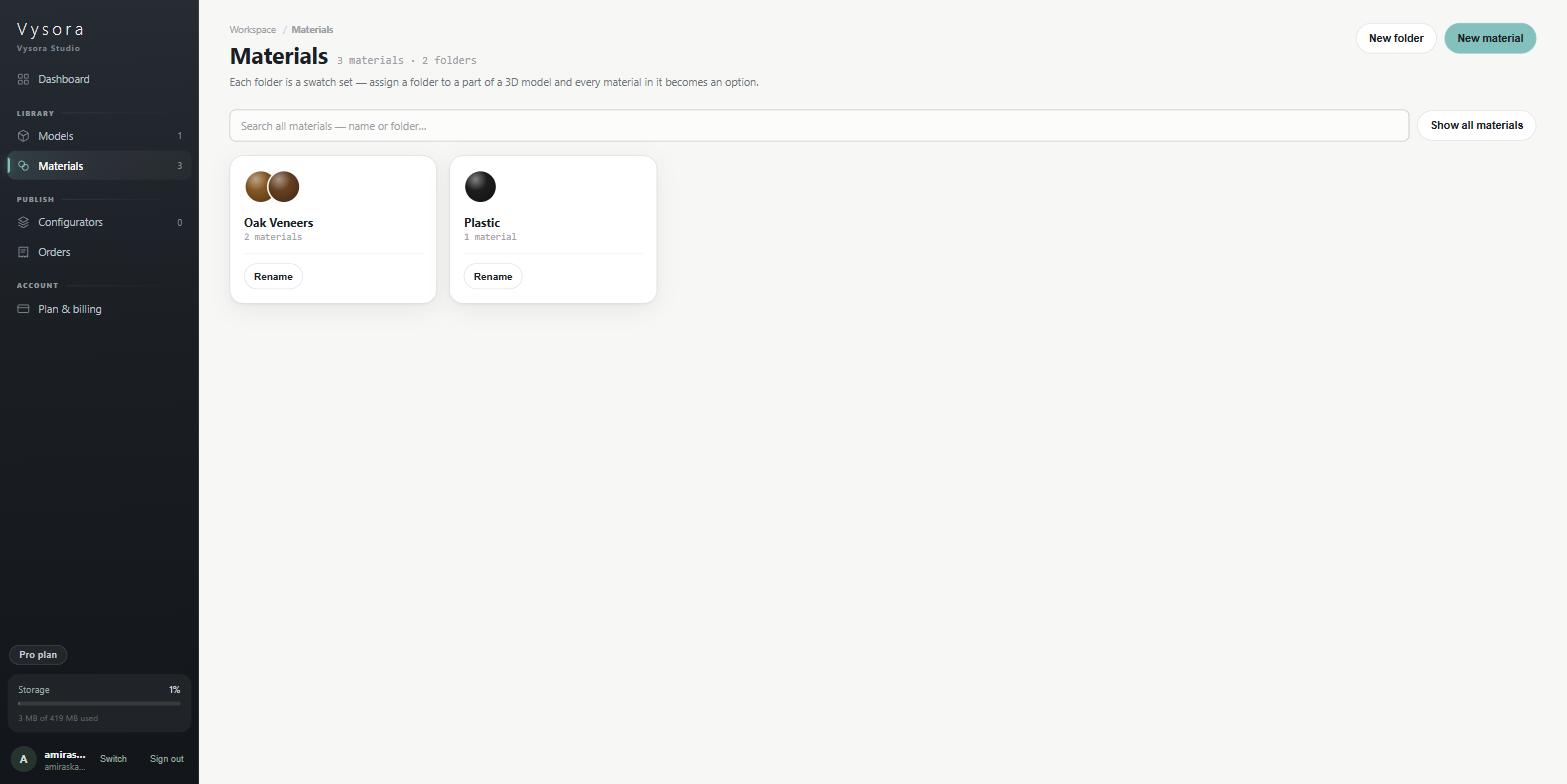
Three things to know before you rely on it:
- It copies what is on screen, including edits you have not saved. It is not "save, then copy". The original is left exactly as it was unless you also press
Save changes. - The name is auto-incremented.
BronzebecomesBronze 2, andBronze 2becomesBronze 3. A name that happens to end in a number is treated as a counter, soOak 2024duplicates toOak 2025. Rename the copy if that is not what you wanted. - The texture is shared, not copied. A duplicate costs nothing against your texture quota. If you later upload a new texture onto the copy, it gets its own file — you cannot overwrite the original's texture by editing a duplicate.
After duplicating, the editor switches to the new copy, so the next thing you edit is the duplicate and not the original.
Renaming a folder
Rename sits on each folder card at the root view. There is no rename from inside an open folder and none from the material editor. Unfiled cannot be renamed.
The rename itself is instant and complete: every material in the folder picks up the new name at once. What it does not do is reach a configurator you have already published.
Moving materials between folders
Turn on Select outside the root view, click the cards you want, and the bulk bar appears. Move to folder… gives you a field with autocomplete over the existing folder names; typing a name that does not exist creates it. The inline warning, also changes which parts show them, is the point of the whole page restated at the moment it matters.
Show all materials is useful here. It ignores folders entirely and shows one flat grid, which is the easiest way to see what has drifted into Unfiled.
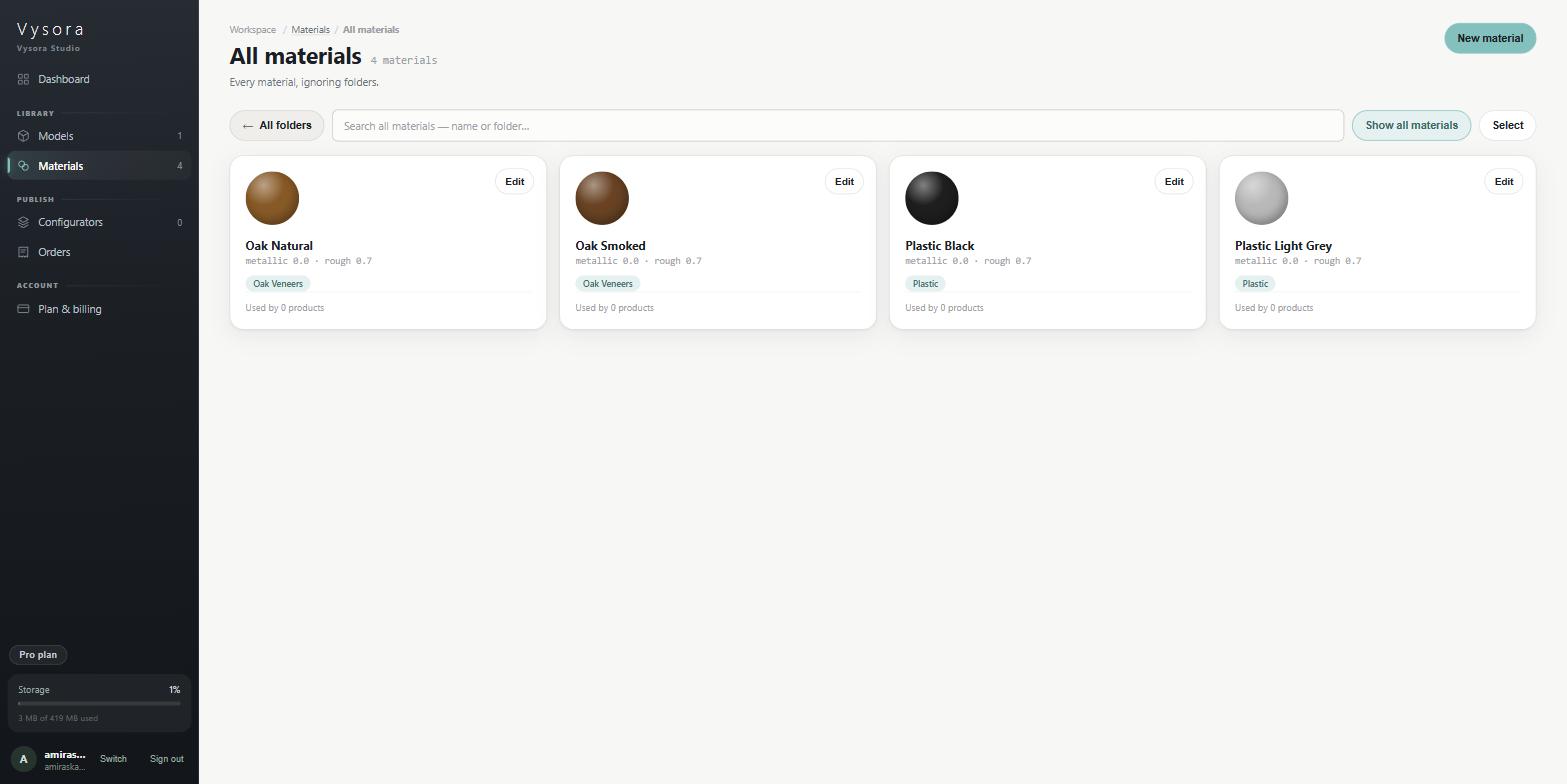
Search works across every folder regardless of where you are standing, and matches on the material name or its folder name. The grid pages 24 materials at a time, with a Load {n} more button when there are more.
A bulk operation handles up to 500 materials at once.
Deleting
A material is deleted from its editor footer. Delete arms it, Confirm delete does it. In bulk, Delete in the selection bar becomes Delete {n}, with the warning permanent — configurators using them will lose the material.
Nothing checks usage first. Each material card shows Used by {n} products, but neither the single delete nor the bulk delete reads that number or warns you about it. Look at the count before you delete, because there is no undo, no trash and no version history anywhere in this screen.
A folder has no delete control, and does not need one. Empty it — move every material out, or delete them — and the folder disappears from the root view on its own. Materials left with no folder fall into Unfiled.
Nothing here announces success
Vysora Studio has no toasts and no confirmation messages. A successful save closes the editor, a successful move closes the bulk bar, and the grid re-renders. Silence means it worked.
Next
Once you have at least one folder with materials in it, you can attach it to a part of a model — see Making parts recolourable.